The 3D views below are stereo pairs
adjusted for parallel viewing.
You can view these with the naked eye using the same "distant gaze"
method used for
viewing the "Magic Eye" random dot stereogram posters that were
popular
a few years ago.
If you have not viewed images like this
before, or are having trouble seeing in 3D,
consult our 3D Viewing Help Page for tricks, tips and information.
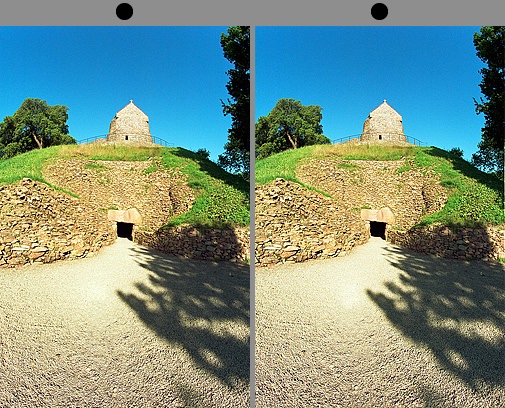
Moving West into the Tomb
The restored facade, forecourt and entrance
to the passage grave.
Note how the small crypt window of the chapel is aligned over the axis
of the passage grave.

The forecourt area.
The 1920's excavations and tunnel construction destroyed most of
the archaeology in this area.
Soon after construction of the primary
cairn the passage was extended,
the cairn was increased to accommodate this and the original facade was
covered by this newer version.
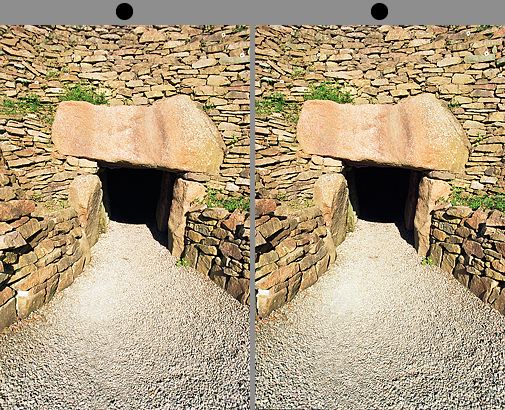
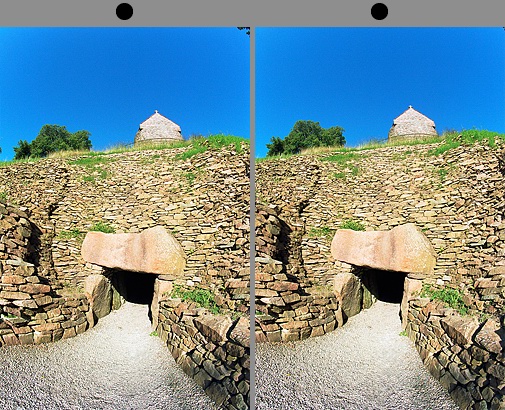
The entrance portal.
The northern (right) upright is a modern replacement, the original had
been removed causing the lintel stone to fall blocking the passage.
The removal was probably part of the final sealing of the tomb around
3000 cal BC, but it is just possible that it may have occurred as late
as the Middle Ages.
The passage viewed from beneath the portal
lintel. Note the dry stone walling
extreme right, this is the original facade of the primary cairn. The
passage was
extended by 2.4m very soon after the primary cairn was completed, so this
original
facade is now buried behind the cairn material added to accommodate the
increased
passage length. The original entrance to the primary cairn stood roughly where
the
shadow-line crosses the passage in the above photo.
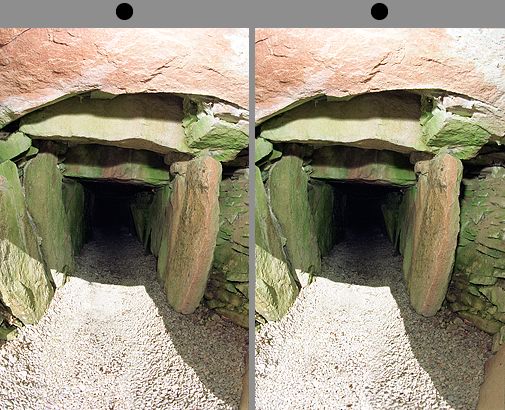
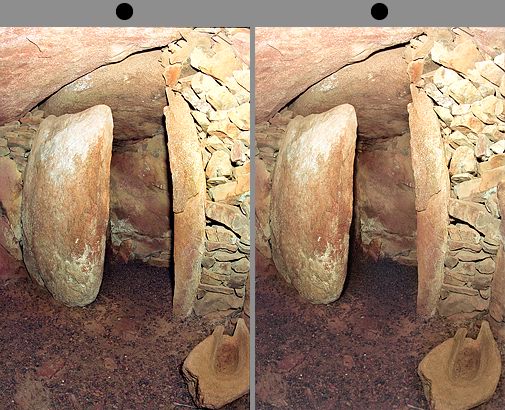
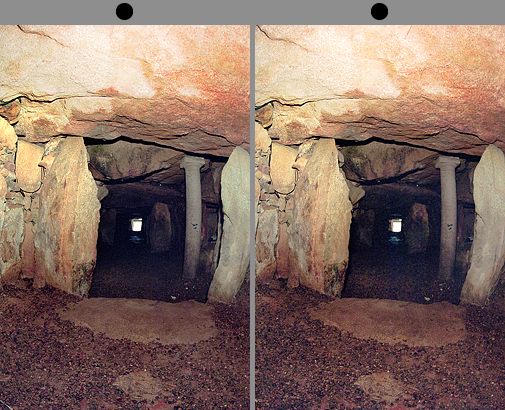
The beginning of the chamber.
At the end of the passage the northern wall bulges out to form the chamber.
Here we see the three orthostats that constrict and segment this part of
the chamber, and beyond them the shadows of the main chamber area.
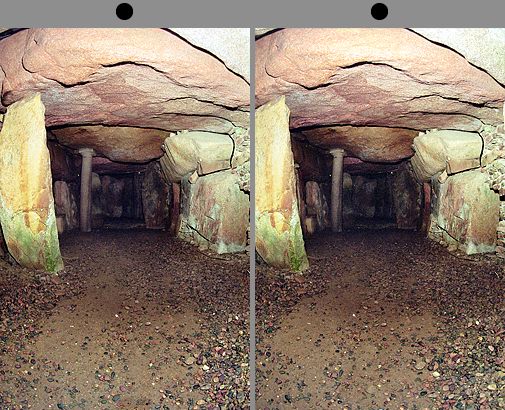
The main chamber area viewed from the segmenting stones.
The final segmenting stone is visible left and the cup-marked stone of the
northern
side chamber is far right. The "sanctuary" area lies just beyond
the support pillar
mid-left.
This cupmarked stone has been used in the
construction of the northern side chamber,
it bears 24 cups but they were originally buried in the dry stone walling here,
the alcove
we see above is modern. This stone was obviously part of an earlier
megalithic structure
which has been re-used in the construction of the passage grave. The
carvings had no
significance to the new monument and the stone was used simply as a structural
element.
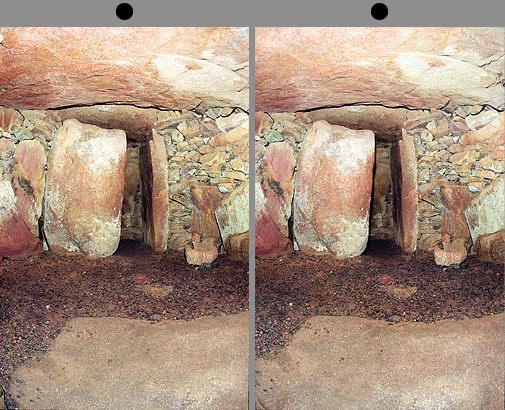
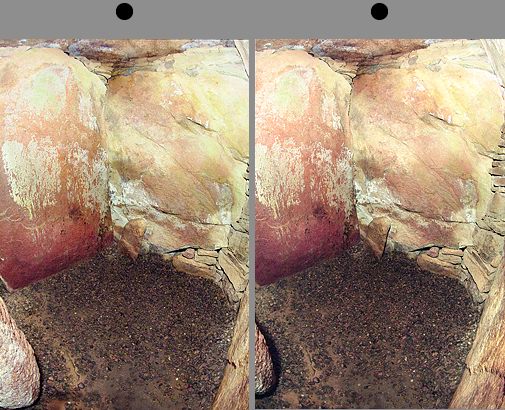
The northern side-chamber.
The stone to the right of the entrance was not in place in photos from the
1920's
and may be a modern addition. A large slab (stone 39) was shown lying across the
entrance, presumably
the closure for the chamber, this has been removed from the tomb.
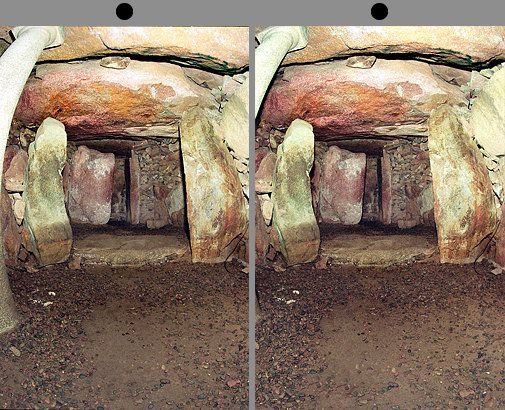
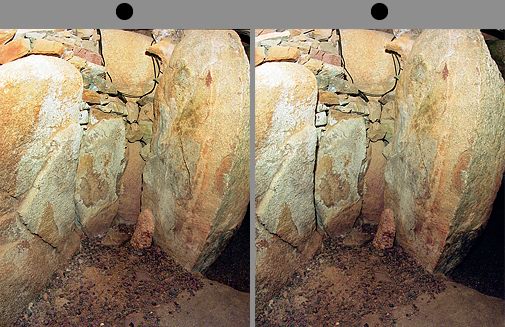
The southern side-chamber.
Apart from the modern roof support pillar, the external structure of this chamber
matches the excavation photos from1924 very well. Note how both side-chambers
have raised floors retained at the entrance by a sill stone.
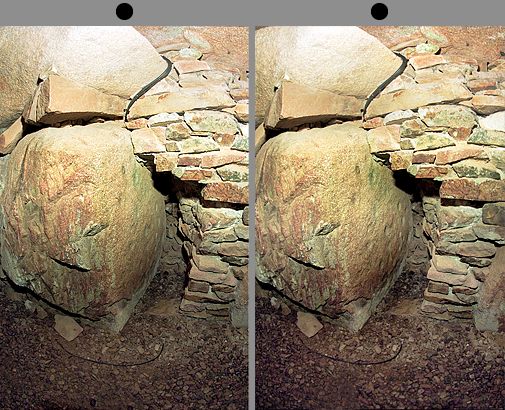
The "sanctuary area" viewed from
the main chamber
The sanctuary area has a raised platform, now fronted by a large sill slab
(stone 33). This slab was found lying in front of the southern side-chamber
and it was relocated to its present position in the 1920's, whether this is
the
stone's original location is debatable.
The "Sanctuary area" and the terminal
chamber.
The sill slab is in the foreground and the broken quern that once supported
the front slab of the terminal chamber is far right. This stereo shot
illustrates
the unusual free-standing nature of the front chamber slab very well.
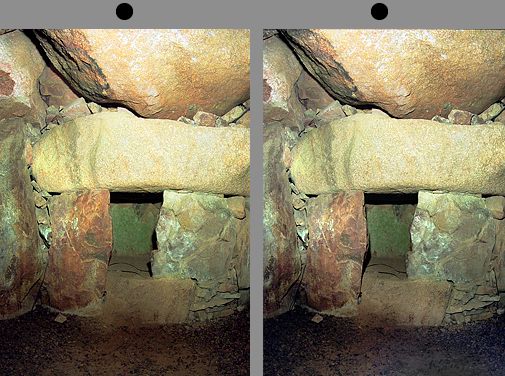
The terminal chamber.
The broken quern that once supported the chamber front slab is visible in
the
right foreground, the small "betyle" stone can be seen in the far corner of
the
chamber itself.
The interior of the terminal chamber.
Note the small stone, or "betyle" standing in the SW corner, three
similar
stones were located behind the sanctuary segmenting stones.
Moving East out of the Tomb
The view east from the doorway of the
terminal chamber.
That tiny rectangle of light in the distance is the entrance portal,
almost 19 metres away. We are beneath the centre of the mound here, and
many
hundreds of tons of stone are suspended above our heads.
The "niche" behind the northern
segmenting stone of the sanctuary area.
Two of the "betyle" stones can be seen in the recess, one of these
tiny
standing stones has fallen and lies beside its still-erect partner.
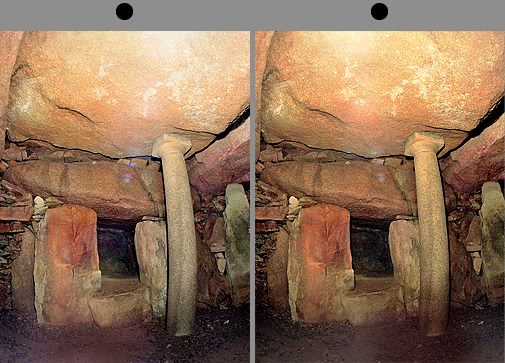
The view east from the sill stone of the
sanctuary area.
A quick glance at the roof in stereo really illustrates the need for
the
the modern support pillar!
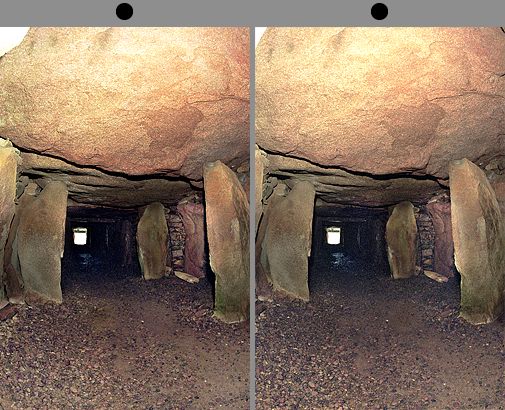
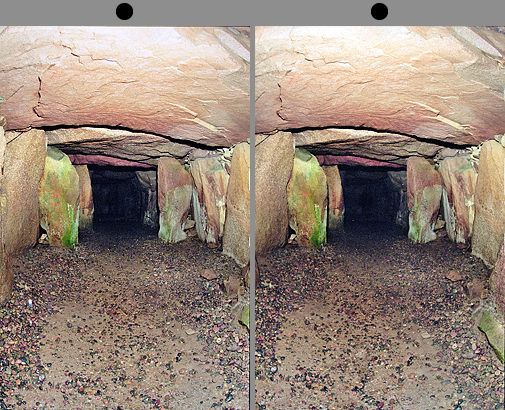
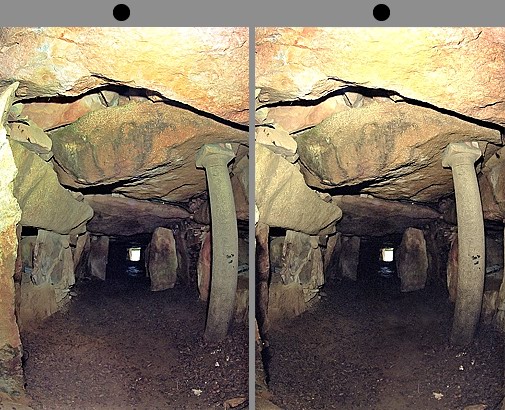
The distant entrance portal viewed from the
main chamber area through
the segmenting stones of the first section of the chamber.
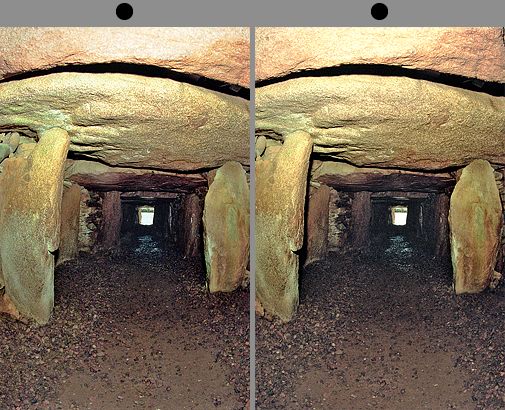
The beginning of the passage viewed from
the chamber segmenting stones.
Note how only the northern (left) wall bulges out to form the chamber, the
southern
wall runs straight.
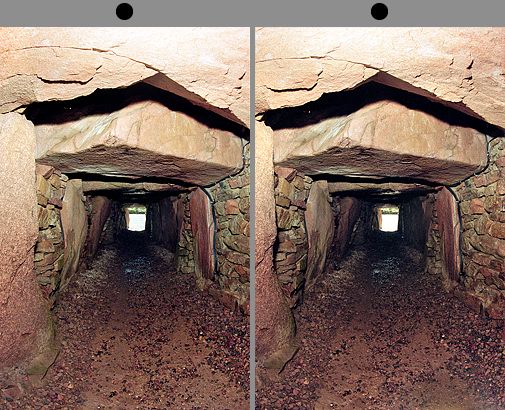
The whole length of the passage viewed
from between stones 9 & 46.
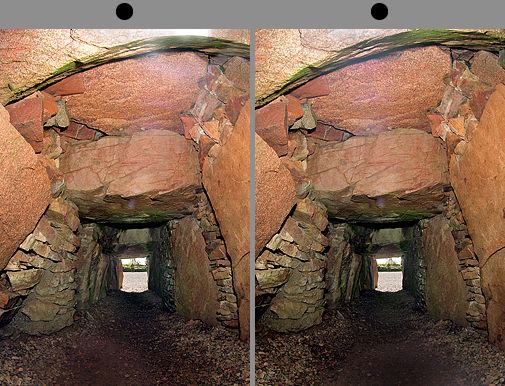
Midway along the passage between stones 7
& 48.
The roof-slab here is one course higher than the others and mainly supported by
the
roof-slabs in front and behind, rather than the sidewalls.
This arrangement was employed once more in the roof recess
visible behind this one, that section failed, blocking the passage with a roof
fall.

Under the first roof recess beside stones
50 & 51.
The roof here was originally comprised of two long slabs that spanned the gap
between the roof stone in the upper centre of the shot and the roof stone out of
shot
behind this location. These stones failed and caused a roof fall here, blocking
the passage,
when this was discovered by the 1920's excavators they dug a shaft down from
above
and removed the fallen material. The concrete visible in the above shot is a
plug
that was inserted to stabilise the roof here.